 Magnet swapping photos and explanation (Pic heavy)
This is so easy, even I can do it. Believe me, that's saying something.
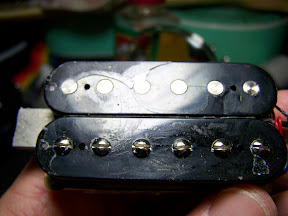
For this particular photo demo, I used an AlNiCo V covered pickup, and I'm putting in a rough-cast AlNiCo IV magnet. The original PAFs used the rough or sand cast magnets, and up until 1961 or so, used A2, A3 and A4 magnets. In my case, I'm also using the historically correct length for an early PAF, 2.37 inches. Gibson switched to a longer 2.5" magnet later in the 60s.
First I removed the pickup surround, then I used a Dremel to cut the solder that holds the cover on.

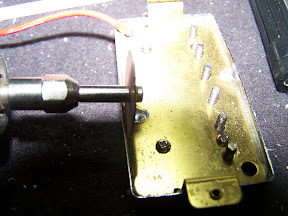
Then I gently loosened the cover using a small screwdriver, breaking the wax seal.

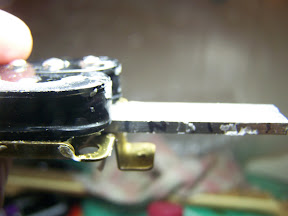
Edit: Loosen the four bobbin screws on the bottom of the baseplate before you attempt to get the magnet out. In the photo above, they are the only phillips screw heads showing. Once the cover was removed, the magnet was easy to see. It's sitting on the baseplate between the polepieces and slug pieces.
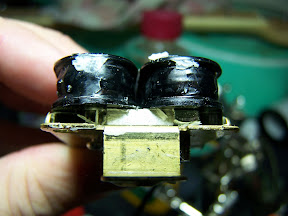
After loosening the magnet by using a small screwdriver once again, I started to gently push the magnet out. Be careful when doing this, and avoid touching the windings! A broken winding will most likely result in an unusable pickup.
Be sure and mark North on the pickup you're removing so you can reuse it later, if so desired. The North side will face the slug bobbin (the one without screws) on a normal PAF style humbucker.
I have two sizes of magnet, the 2.37 and the 2.5 inch, so I measured to see which one this pickup was loaded with. As I said above, this is the historically correct 2.37" magnet. I think it's actually 2.36xxxx or something, but 2.37 is close enough.

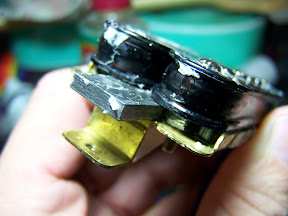
Next I inserted the new A4 magnet, making sure to line up North with the slug bobbin side.

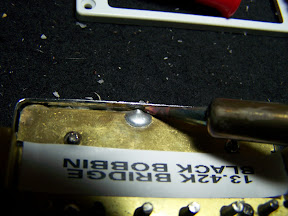
Once the magnet is fully inserted and evenly lined up, tighten the bobbin screws back down, put the cover back on and re-solder the cover to the baseplate.
Ideally you should first dip the cover in melted parafin (or beeswax if you're very fancy). If you don't have wax handy, you can also put a thin piece of masking tape over the slug bobbin before putting the cover back on to help dampen the metal-to-metal contact. I'll probably use a hair dryer to get some wax melted and to help suppress microphonics. The older PAFs were actually unpotted, but I prefer less feedback to historical correctness in this case.
That's it! Not too hard, is it? I was a little intimidated at first, but it's been pretty easy so far. I'll be happy to answer any questions and help my fellow Fretters with their magnet swaps, if I can. I'm certainly far from expert, but I do have some experience now.
Last edited by FrankenFretter; November 11th, 2010 at 06:30 PM.
Reason: Missed an important step or two!
-Sean
Guitars: Lots.
Amphs: More than last year.
Pedals: Many, although I go straight from guitar to amp more often lately.


 Reply With Quote