Warning: preg_replace(): The /e modifier is deprecated, use preg_replace_callback instead in ..../includes/class_bbcode.php on line 2968
Warning: preg_replace(): The /e modifier is deprecated, use preg_replace_callback instead in ..../includes/class_bbcode.php on line 2958
Warning: preg_replace(): The /e modifier is deprecated, use preg_replace_callback instead in ..../includes/class_bbcode.php on line 2958
Warning: preg_replace(): The /e modifier is deprecated, use preg_replace_callback instead in ..../includes/class_bbcode.php on line 2958
Warning: preg_replace(): The /e modifier is deprecated, use preg_replace_callback instead in ..../includes/class_bbcode.php on line 2958
Warning: preg_replace(): The /e modifier is deprecated, use preg_replace_callback instead in ..../includes/class_bbcode.php on line 2958
Warning: preg_replace(): The /e modifier is deprecated, use preg_replace_callback instead in ..../includes/class_bbcode.php on line 2958
Warning: preg_replace(): The /e modifier is deprecated, use preg_replace_callback instead in ..../includes/class_bbcode.php on line 2958
Warning: preg_replace(): The /e modifier is deprecated, use preg_replace_callback instead in ..../includes/class_bbcode.php on line 2958 Amp build: Allen Sweet Spot
I've been looking around at smaller Fender "Blackface" era amps (Deluxe Reverb, Princeton Reverb) for a while, hoping to find one in good condition and (preferably) with all original parts, with the exception of the tubes and filter caps. But after missing out on a couple of good deals and seeing a mixture of amps that were either (1) stunning vintage examples and priced accordingly, or (2) more reasonably priced but with less desirable pedigrees, I decided it was time to scratch the Blackface itch in some other way.
I started looking around at kits, and the name of Allen Amplification kept coming up. As I understand it, it's a one man operation run by David Allen, and has a reputation for top quality amps based upon the classic vintage Fender designs, but with some more modern design improvements. In addition to selling completed amps, David also offers his various designs in kit form. I was looking for a reasonably low wattage amp with both reverb and tremolo, and I found that his Sweet Spot amp, based upon the Princeton Reverb, fit the bill perfectly. Allen's amps and kits are certainly not the cheapest available, but they have a great reputation for quality, design excellence, customer service and--most importantly--great tone. I placed my order on Wed. Apr. 29, and the chassis kit was delivered last Friday, May 3. I went with a 1x12 combo, but the cabinets are built to order and take about 6 weeks.
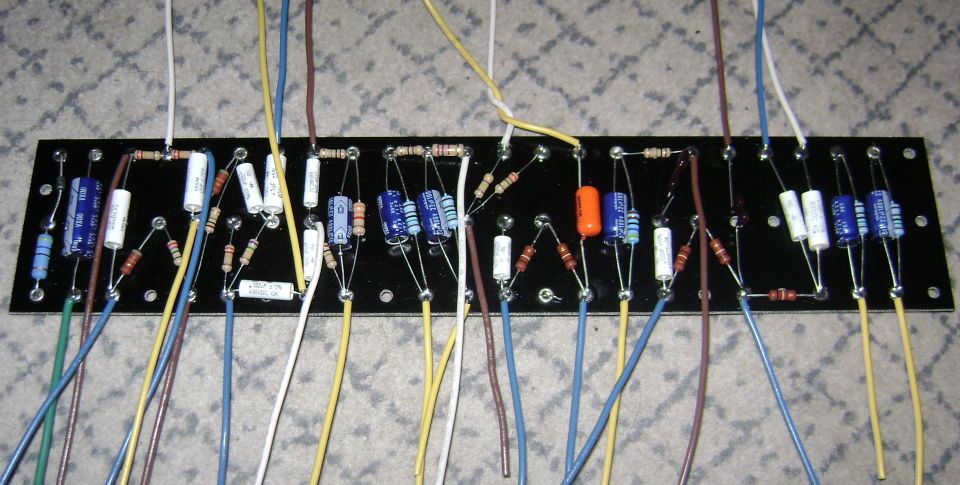
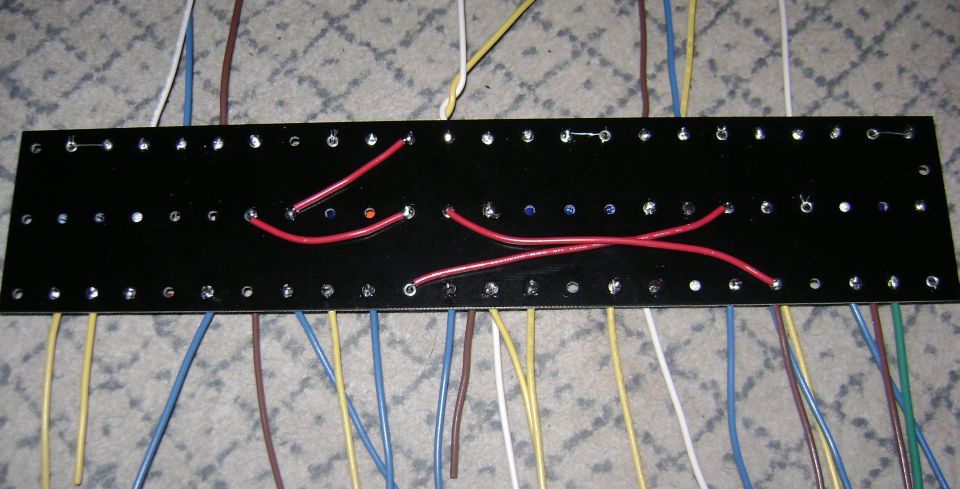
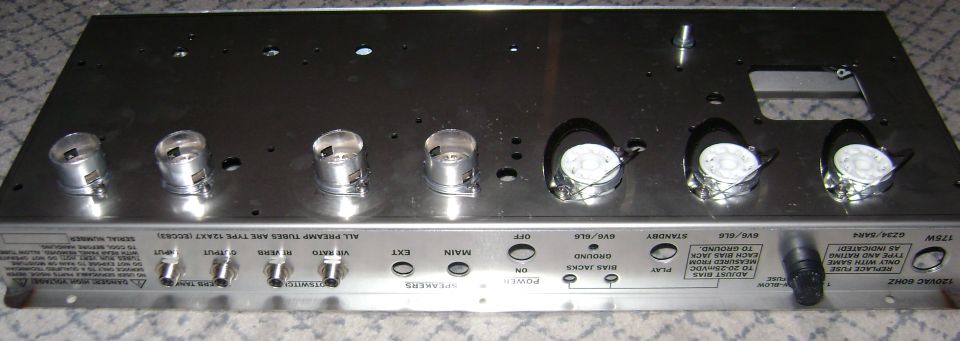
The Sweet Spot is what David calls a "bares bones" kit, so it does not come with detailed, step by step instructions and is therefore intended for reasonably experienced builders. The kit documentation included a parts list, schematic, layout diagrams of the main eyelet board, filter cap board and chassis wiring, assembly tips, and operating instructions. Going through the kit contents, I found that there had been one oversight--a bag full of hardware had been left out. I contacted David by e-mail on Saturday and received a response within a few hours, and the missing parts will be on their way on Monday. Now, that's the kind of customer service I was hoping for!
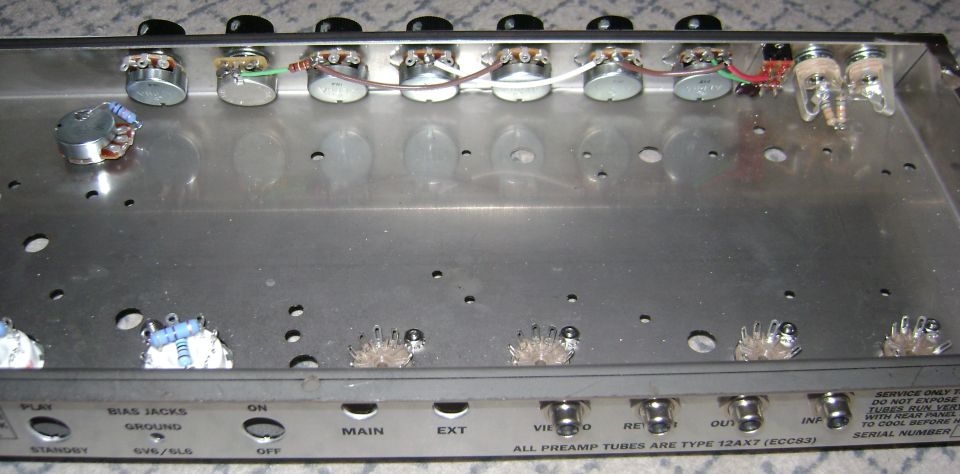
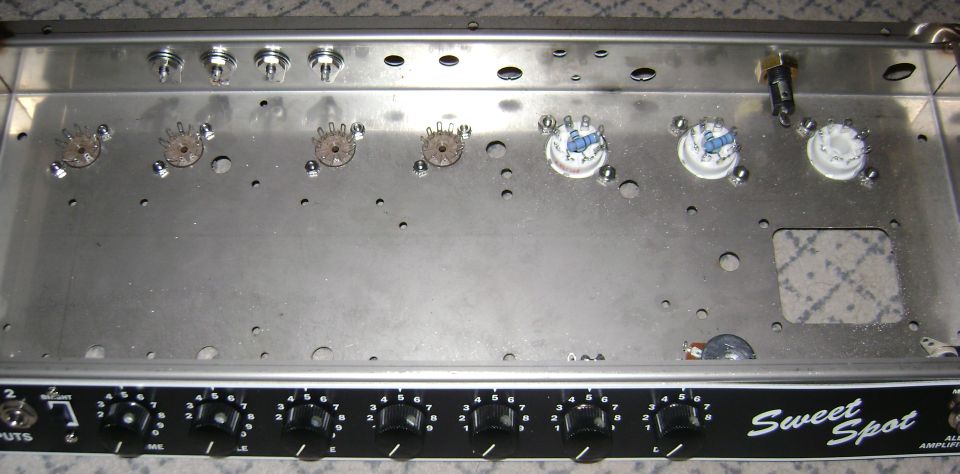
Even with the missing hardware, I still had plenty I could work on. I populated both eyelet boards, including connecting the "flying leads", mounted the control pots, input jacks, tube sockets and several other parts on the chassis. I also wired the resistors into the input jacks and power tube sockets, did most of the wiring between the control pots, and connected the bright switch. That's pretty much as far as I can go now until the missing hardware arrives. Here are some photos of the progress so far:
And here's a special graphic for Rev Rawk:
DVM's Ever-Expanding Gear List:
Guitars - W-A-A-A-Y-Y too many to list. Check 'em all out HERE


 Reply With Quote