Warning: preg_replace(): The /e modifier is deprecated, use preg_replace_callback instead in ..../includes/class_bbcode.php on line 2968

Warning: preg_replace(): The /e modifier is deprecated, use preg_replace_callback instead in ..../includes/class_bbcode.php on line 2958
First attempts at self built pedal kits - Page 2
Page 2 of 2 FirstFirst 12
Results 20 to 34 of 34

Thread: First attempts at self built pedal kits

  1. #20
    Join Date
    Sep 2007
    Location
    Clarksburg, WV
    Posts
    209
    Post Thanks / Like

    Default

    Well guys. I have officially caught the bug. I went to radio shack today and bought one of those little alligator clip stands, some flux, and some practice materials so that I could figure out this soldering thing before I mess anything else up. I first must say that flux is quite possibly one of the most amazing things ever invented haha. It has made soldering so much easier and really even made it enjoyable. Once I figured it out I went back and started to re-solder every joint. I must say it looks wayyyy better than it did before. All of the joints are nice and shiny and have that desired volcano shape. Using a little flux even mended that cold eyelet that I thought was useless earlier. I haven't finished putting all the wiring yet, but I am much more confident that it will work this time. At least if it doesn't it should be easier to diagnose the problem without all those horrible looking solder joints all over the board. I'll do my best to find a good camera to take some pictures so you guys can tell me what you think! All in all. I'm pretty excited to do some more of this stuff.

    A few quick questions that I didn't find in the manual on ggg's site or elsewhere.
    1) How do I know how to orientate the switch? Is there some sort of sign or notch that I'm missing or does it just not matter as long as the sockets are running horizontal?
    2) What do you guys use to clean the soldering tip? I looked at a good few tutorials online, but they all said just to tin the tip, wipe it off on a wet sponge, and then tin the tip again before use or storage. For whatever reason I can seem to get the tip to tin very well and the sponge does little to clean off the charred residue.

  2. #21
    Join Date
    Aug 2008
    Posts
    323
    Post Thanks / Like

    Default

    I'm assuming you have a 3-way DPDT switch (9 pins in total), which means there are 3 individual circuits/switches inside. With the pins facing horizontally, each vertical set of pins makes one circuit/switch. For arguments sake let's call them 1,2,3 from top to bottom.
    Pin 2 is the common connector, and pressing the switch button will make a connection between 1&2, or 2&3. As you said, as long as the pins are facing horizontal, then you should be ok.

    As far as cleaning the soldering tip, I just use a damp cloth.
    Guitars: Epiphone SG-400 Custom; Epiphone Firebird V; 1996 Gibson LP Standard; Avion 4; Yamaha FG-301B acoustic

    FX: TS-808; Big Muff (Triangle Version); Red Llama; Green Ringer Octave Up (Clones); Maxon Phaser; Maxon Compressor; Tremulus Lune Tremolo; Line 6 POD II

    Amp: (Somewhere in another country) Hiwatt 100W head, Marshall 4x12 cab

    My noise here

  3. #22
    Join Date
    Dec 2007
    Location
    In The Middle Of The Arrpeggio
    Posts
    1,395
    Post Thanks / Like

    Default

    The soldering stations i used to to use always had a compartment with a little sponge in it that you keep wet...and when you need to clean your tip you dip it into the wet sponge.....as Suhn says...a wet cloth will work too.
    Guitars: 2002 Les Paul Studio Limited Color's Edition | 2004 Greg Bennett Avion Les Paul Copy | S101 Telecaster project | 2004 Washburn D46 Acoustic

    Amplification: Epiphone Valve Jr. Head and Cabinet | VOX AD30VT

    Effects: Rocktron Delay | BBE Free Fuzz | Big Muff Pi | Boss Flanger | Bad Monkey | Jekyll and Hyde | Cry Baby Wah | Boss EQ | Behrenger TU300 Tuner |


  4. #23
    Join Date
    Feb 2006
    Location
    Uppah Noo Yawk
    Posts
    7,407
    Post Thanks / Like

    Default

    If you use the cheap soldering irons without temp. control (which are the only find I've ever used for pedal work), resign yourself to replacing the tips often. They run hot, and the high temps just chew up the tips in a hurry. I keep a healthy supply of tips on hand, because I rarely get more than a couple of builds out of a tip. I prefer the chisel-style tips, and they invariably develop a groove right in the middle of the chisel edge that gets deeper and deeper, until they're Y-shaped. The conical tips seem to last longer, but I don't find them as easy to use. Just personal preference--YMMV.

    BTW, you should tin them immediately upon first use, because once they develop an oxide coating, getting them to tin up is very difficult. THIS STUFF helps in that regard. I usually treat the tip with this cleaner at the beginning and end of each session of use.

    Waitin' patiently for those pix....
    DVM's Ever-Expanding Gear List:

    Guitars - W-A-A-A-Y-Y too many to list. Check 'em all out HERE

    Amps & Cabs - "Kap'n Kerrang-aroo" BYOC 18W TMB kit amp head; Mojave Coyote head; Fender Hot Rod Deluxe Lacquered Tweed Ltd. Ed.; Allen Sweet Spot kit amp; BYOC Tweed Royal kit amp; Epiphone Valve Jr. combo + mods; Drive 2x12 cab / Celestion G12M Greenback + G12H30; AB Custom Audio 1x12 cab / Celestion Alnico Blue

    Pedals/Effects - ZILLIONS, including DVM's Home-built Pedals - See some HERE and HERE, TOO!

    DVM's Gear Photos
    Visit MY WEBSITE!


  5. #24
    Join Date
    Sep 2007
    Location
    Clarksburg, WV
    Posts
    209
    Post Thanks / Like

    Default

    IT IS ALIVEEEEE!!!

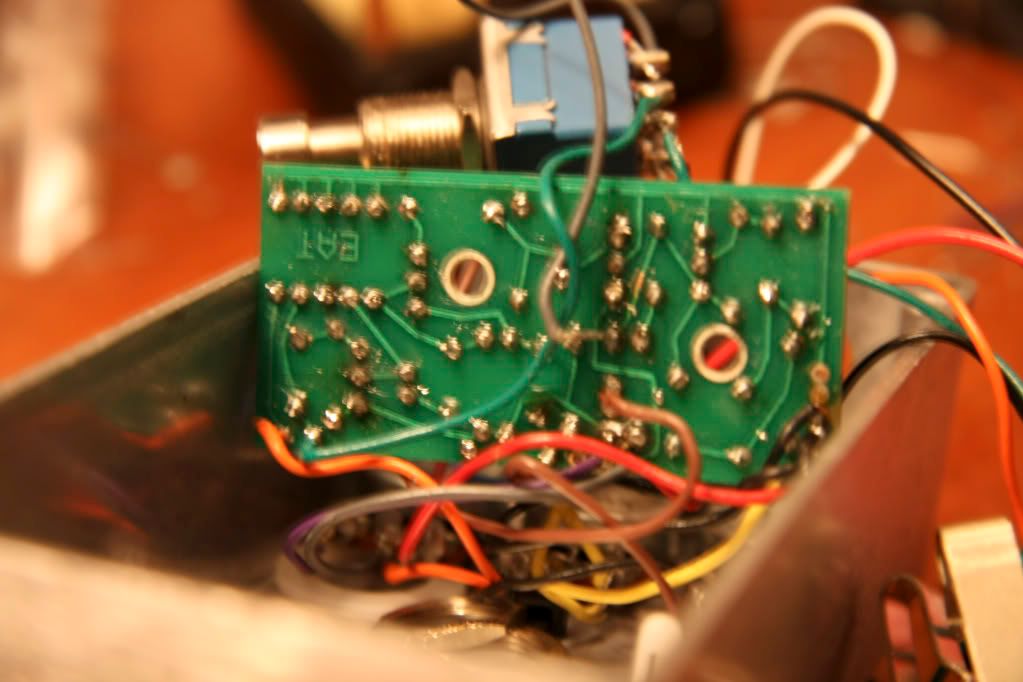
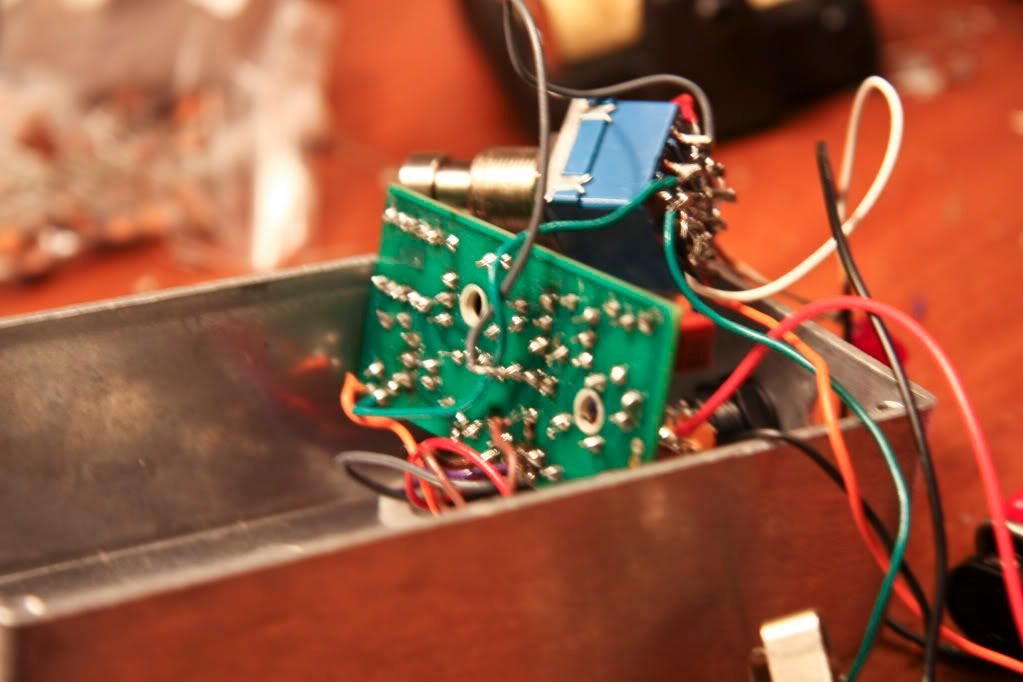
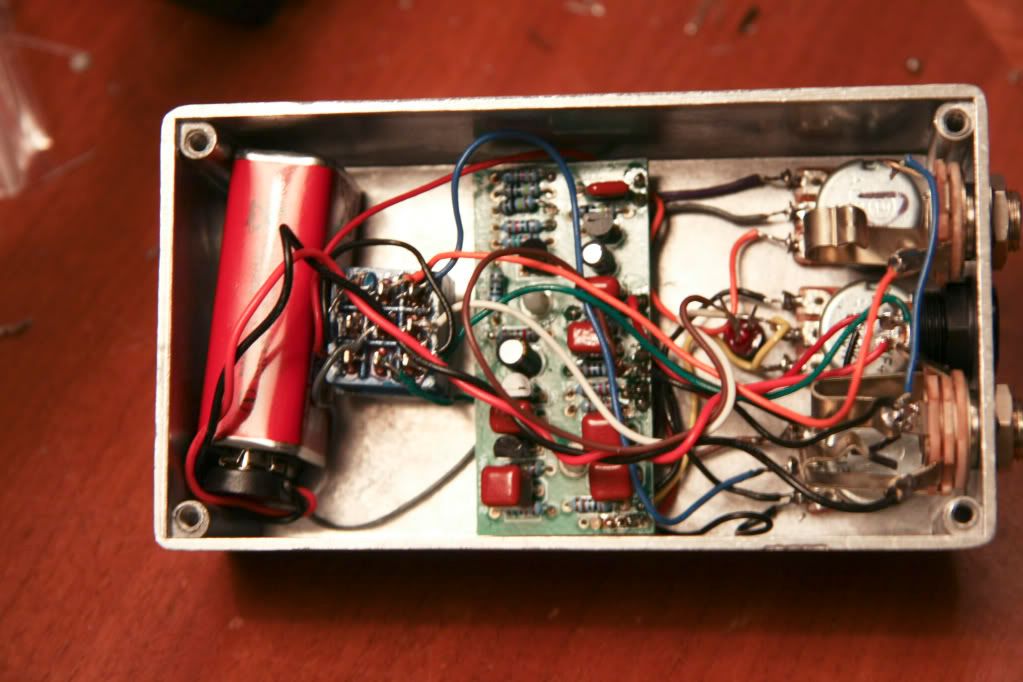
    So i finished it up last night and low and behold, it actually works! Here are some pics. Some are a little blurry b/c they are so close up, but you can still see the solder job alright. I can't describe how happy I was when I first heard this thing do the wobble with my guitar haha.


  6. #25
    Join Date
    Aug 2008
    Posts
    323
    Post Thanks / Like

    Default

    Congrats on your first build. Let's have a listen then...
    Your next project should come together a lot easier. Is the Tube Screamer kit you purchased the standard kit or did you order "options" as well?
    Guitars: Epiphone SG-400 Custom; Epiphone Firebird V; 1996 Gibson LP Standard; Avion 4; Yamaha FG-301B acoustic

    FX: TS-808; Big Muff (Triangle Version); Red Llama; Green Ringer Octave Up (Clones); Maxon Phaser; Maxon Compressor; Tremulus Lune Tremolo; Line 6 POD II

    Amp: (Somewhere in another country) Hiwatt 100W head, Marshall 4x12 cab

    My noise here

  7. #26
    Join Date
    Feb 2006
    Location
    Uppah Noo Yawk
    Posts
    7,407
    Post Thanks / Like

    Default

    That soldering looks a LOT better than your first attempt. Congrats on your first working build! :
    DVM's Ever-Expanding Gear List:

    Guitars - W-A-A-A-Y-Y too many to list. Check 'em all out HERE

    Amps & Cabs - "Kap'n Kerrang-aroo" BYOC 18W TMB kit amp head; Mojave Coyote head; Fender Hot Rod Deluxe Lacquered Tweed Ltd. Ed.; Allen Sweet Spot kit amp; BYOC Tweed Royal kit amp; Epiphone Valve Jr. combo + mods; Drive 2x12 cab / Celestion G12M Greenback + G12H30; AB Custom Audio 1x12 cab / Celestion Alnico Blue

    Pedals/Effects - ZILLIONS, including DVM's Home-built Pedals - See some HERE and HERE, TOO!

    DVM's Gear Photos
    Visit MY WEBSITE!


  8. #27
    Join Date
    Apr 2006
    Location
    NW Missouri,
    Posts
    4,097
    Post Thanks / Like

    Default

    Glad to hear you got it going. The solder job looks much better.

    (I seem to remember "It's alive!" being posted by Vood somewhere in the past also.......)

    Nice job.:
    Guitars
    Wilburn Versatare, '52 FrankenTele(Fender licensed parts), Fender USA Roadhouse Strat, Fender USA Standard B-bender Telecaster, Agile AL 3000 w/ WCR pickups, Ibanez MIJ V300 Acoustic, Squier Precision Bass,
    Amps
    Ceriatone Overtone Special, Musicman 212 Sixty-Five, Fender Blues Jr., Peavey Classic 30, Fender Super Reverb, Traynor YCV-40 WR Anniversary w/ matching 1x12 ext. cab, Epiphone SoCal 50w head w/ matching 4x12 cab (Lady Luck speakers), Avatar 2x12 semi-open back cab w/ Celestion speakers
    Pedals
    Digitech Bad Monkey, Digitech Jamman, DVM's ZYS, Goodrich volume pedal

  9. #28
    Join Date
    Sep 2007
    Location
    Clarksburg, WV
    Posts
    209
    Post Thanks / Like

    Default

    I'll put some clips up sometime in the next few days. I got finals comin so we'll see what that means for free time haha.

    Also, I ordered the options kit with it. I figured it was only like 8 bucks or something so why not. Do you have any listening experience with this pedal and/or some of the extra mods you can do with this kit? I was probably just going to do all the mods but I would love to know if there is a particular one I should stay away from.

  10. #29
    Join Date
    Sep 2007
    Location
    Clarksburg, WV
    Posts
    209
    Post Thanks / Like

    Default

    Here's a little taste of the goods. Playing an american tele through fulldrive 2 and the tremelo into a hot rod deluxe. There's a few funky chords but you get the idea.

    http://myspace.com/justinstonezone

  11. #30
    Join Date
    Aug 2008
    Posts
    323
    Post Thanks / Like

    Default

    Very tasty, nice playing there man.
    You also look like you've been hitting the weights in your photo.
    Guitars: Epiphone SG-400 Custom; Epiphone Firebird V; 1996 Gibson LP Standard; Avion 4; Yamaha FG-301B acoustic

    FX: TS-808; Big Muff (Triangle Version); Red Llama; Green Ringer Octave Up (Clones); Maxon Phaser; Maxon Compressor; Tremulus Lune Tremolo; Line 6 POD II

    Amp: (Somewhere in another country) Hiwatt 100W head, Marshall 4x12 cab

    My noise here

  12. #31
    Join Date
    Sep 2007
    Location
    Clarksburg, WV
    Posts
    209
    Post Thanks / Like

    Default

    Thanks man. The apparent weight lifting is residual from working in construction over the summer. I don't have much time to lift weights between guitar, church, and school haha. And for the record, I don't actually wear shirts like that on a regular basis. That pic is from a concert at my school where we covered don't stop believing and were all dressed up like journey haha.

  13. #32
    Join Date
    Feb 2006
    Location
    Uppah Noo Yawk
    Posts
    7,407
    Post Thanks / Like

    Default

    Quote Originally Posted by vroomery
    IAlso, I ordered the options kit with it. I figured it was only like 8 bucks or something so why not. Do you have any listening experience with this pedal and/or some of the extra mods you can do with this kit? I was probably just going to do all the mods but I would love to know if there is a particular one I should stay away from.
    The MOSFET conversion kit allows you to install MOSFET components in 5 places in the circuit: the input and output buffers, the clipping stage, the opamp, and the boost stage. I initially installed them everywhere but the output buffer, based upon some advice I read on Jack Orman's website (next to last paragraph). Jack has forgotten more about effects than I will ever learn in my lifetime. Plus MOSFETs in the buffers are the main contributor to noise in the circuit, and who wants that? The MOSFET input buffer does tend to preserve highs coming into the circuit, so that seemed worth doing. I'm pleased with the results. I'd definitely recommend the MOSFET's in the clipping section. Leave out the LED's, because the diode-lift middle toggle position sounds very nearly the same as the LED's anyway.

    I ended up taking the MOSFET-based opamp out because it didn't sound like anything special to me, and the Burr Brown chip gave somewhat better clarity and note definition. AAMOF, I liked the MOSFET opamp least of the three, preferring the JRC4558D to it also.

    If you want to get fancy with the switch wiring, you can rig up a 3PDT toggle switch that will allow you to put the boost in front of the OD portion of the cirrcuit, as well as behind it, which is the default configuration.
    DVM's Ever-Expanding Gear List:

    Guitars - W-A-A-A-Y-Y too many to list. Check 'em all out HERE

    Amps & Cabs - "Kap'n Kerrang-aroo" BYOC 18W TMB kit amp head; Mojave Coyote head; Fender Hot Rod Deluxe Lacquered Tweed Ltd. Ed.; Allen Sweet Spot kit amp; BYOC Tweed Royal kit amp; Epiphone Valve Jr. combo + mods; Drive 2x12 cab / Celestion G12M Greenback + G12H30; AB Custom Audio 1x12 cab / Celestion Alnico Blue

    Pedals/Effects - ZILLIONS, including DVM's Home-built Pedals - See some HERE and HERE, TOO!

    DVM's Gear Photos
    Visit MY WEBSITE!


  14. #33
    Join Date
    Aug 2008
    Posts
    323
    Post Thanks / Like

    Default

    Are you referring to the Screamer clone with regard to mods?
    I know DVM will probably groan ( ), but I would do the Landgraff mod. It's known as the "Expensive Boutique Mod" in the GGG instruction PDF.
    Or the Bob Keeley Mod, which is what I did. Either way, these mods sound much better than a stock TS-808. I wouldn't bother with the Jack Orman FAT mod, I think it adds too much bass end into the pedal and the OD becomes quite muddy.
    Guitars: Epiphone SG-400 Custom; Epiphone Firebird V; 1996 Gibson LP Standard; Avion 4; Yamaha FG-301B acoustic

    FX: TS-808; Big Muff (Triangle Version); Red Llama; Green Ringer Octave Up (Clones); Maxon Phaser; Maxon Compressor; Tremulus Lune Tremolo; Line 6 POD II

    Amp: (Somewhere in another country) Hiwatt 100W head, Marshall 4x12 cab

    My noise here

  15. #34
    Join Date
    Sep 2007
    Location
    Clarksburg, WV
    Posts
    209
    Post Thanks / Like

    Default

    So I finished the screamer clone pedal up a week or so ago. I might get some pictures up here in a little bit. I basically did the langraff mod but without the diode lift mod. When I first plugged it in it seemed really gritty. My OD up to this point has been a fulldrive 2 in vintage position which is much more smooth sounding. I've been looking for an OD that could get a little dirtier than my fulldrive to use for those screaming solos so this was a good result for me. Then a few days ago I got back to playing with it and was playing a little blues so I pulled back on the drive knob a little bit. Man am I glad I did. There's a certain subtlty about it that has a bit more flavor than just running clean, but when I want to dig into it I can switch to the bridge pup and get a little more breakup. I was planning on doing the giving the keeley mod a run too, but I'm pretty happy with what I've got now.

Page 2 of 2 FirstFirst 12

Posting Permissions

  • You may not post new threads
  • You may not post replies
  • You may not post attachments
  • You may not edit your posts
  •